A Fabulous Pram Re-make Part I: ’90s Emmaljunga “Viking” Stroller/Pushchair

So, it has been a little while!  I last wrote just before giving birth to my daughter and was rushing to complete my last project.  Well, I did finish that stroller chair the day after my last post as I’d hoped.  Today’s post is to detail that process.

Unfortunately I couldn’t begin the second portion of the project before Mini’s arrival, because I didn’t have the necessary fabric and wasn’t willing to tear apart the original bassinet.  Now I do have another one to use and the required yardage, so I began the pattern for the pram today Tuesday.  It seems I can only work on things for a half hour or so at a time these days, so I’m afraid it may be a while before I write about it in favour of actually finishing the piece in order to use before she grows out of it. Hopefully.

The timing was off, but I acquired another “viking” pram and stroller set with fabric in poorer condition than the first.  I only wish I’d had it sooner, because the better hood portion was torn apart to re-cover, and the second is very faded. It’s sad, but I’ll either fix the first one somehow or find some way of making it all work to have an original red set as an option besides what I’m about to show you…

This entire project was quite unnecessary but inspired me far too much to let go.  I had some fabulous fabric in mind to make a really unique and special stroller.  Did I need another pushchair? Not at all, but I wanted to show the world (or at least whoever happens to see it) the pretty thing I could make and to have a fancy stroller for my daughter.  Babies do have a tendency to make people want adorable little things, eh?  Reactions to the linen re-make of the Hedstrom pram has been fantastic, so I can’t wait to have the “viking” done!

Here again are the fabric and the stroller seat attachment:

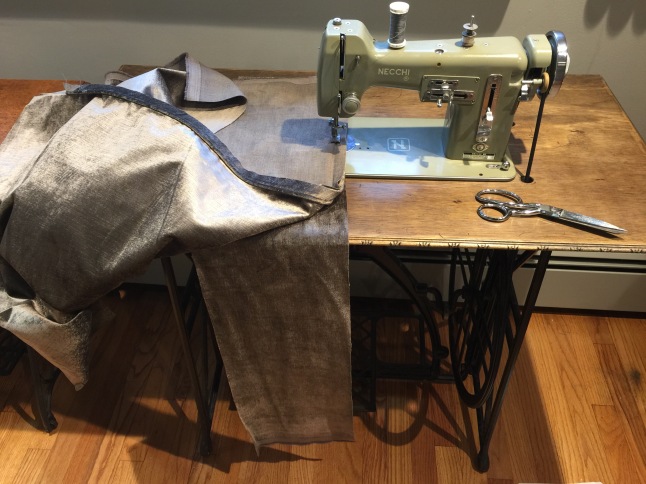
I don’t know about anyone else’s taste, but I love this ikat patterned velvet!  There is a black colour-way that I slightly prefer, but this grey is reasonably neutral besides being fabulously bold.  Whatever colour I’m wearing should go just fine with it, but it makes a statement for sure.  So inspiring!  

Choosing how to use the ikat and plain grey velvet was a difficult decision, and I was very uncertain for days.  I didn’t have enough of the expensive ikat to use it exclusively, and I also felt it was a tad too bold not to tone down with a solid anyway.  It was an easy decision to use the plain grey for the underside pieces of the seat cover, but the hood canopy was a tricky matter.  I was afraid that using ikat as the outer fabric would look “too much.”  I wanted a fabulous stroller and to avoid an unnecessarily busy look in favour of something well planned and eye catching.  To achieve this I began by cutting out the pieces of the seat cover carefully positioned over the portions of the design I liked best and with matching in mind.

Then I tried to settle on the hood design.  I considered using the ikat outside with the inner portion lined with the solid grey.  I thought about doing the front crescent, inner and outer, with the ikat and the lower portion and bag section in the grey.  Then I thought about scrapping the pattern from the original and using a hood design better suited to the ikat!  I could make the bag section less tailored and of one shirred piece, like my Simo stroller, or I could create shaping in my own way with darts or at least make a few changes to the pieces to better frame a large print.  However, I chose to stick with the original, and when I was sure about some of the pieces cut them out to arrange final placement by pinning them to the frame before sewing.

Eventually I settled on the interior being ikat with the grey outside.  I felt it looked more intentional and liked the surprise inside rather than have it look like I was simply saving on material with lesser fabric inside.  (Even now that it is complete I’m not entirely sure I should have gone with this placement, but I do like it most of the time.)

The original cover had a little batting to pad the wooden seat support, but I wasn’t keen on adding a layer like that.  Instead I used a scrap of memory foam (mattress topper) and stapled it under muslin to the boards.  Cushy!

Next I worked on the seat cover.  It was pretty easy except that I mistakenly pinned the flap that secures the cover over the chair frame backwards and had to rip that section out to re-sew.  Due to the velvet and there being many layers I took a lot of time to hand baste each seam before stitching on the machine.  Even so, I managed to catch the edge of one side in a seam.  Drat!  Here you can see the backwards flap and the caught edge before I ripped them out and fixed it:
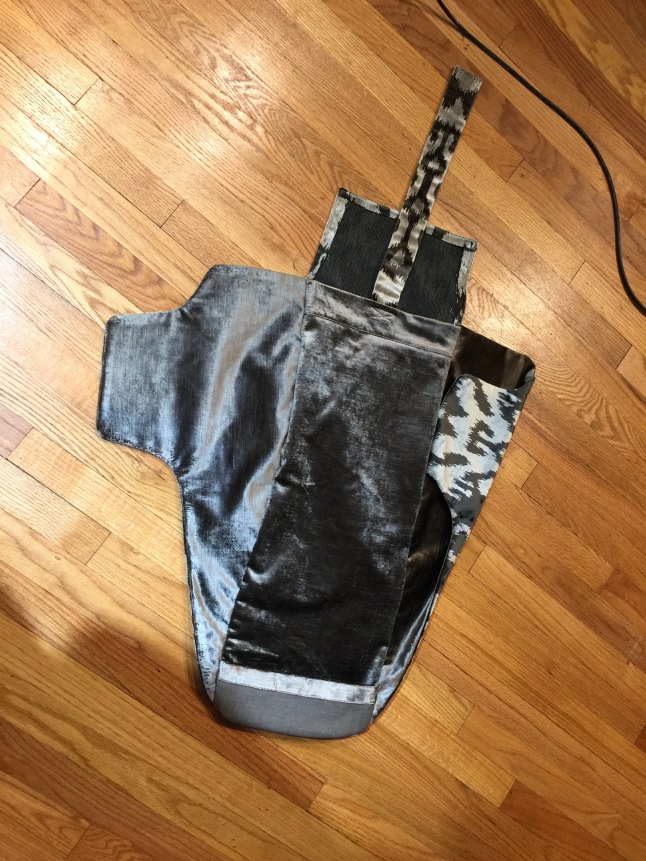
oops.jpg

Very soon the seat was done!

I was very pleased with the results and so tackled the hood.  It involved a lot of pins and hand stitching, and I’m still not thrilled with the way I worked around the riveted bit by slashing the fabric to slide around as best I could.  (This part is making me very hesitant to commit to starting that part of the pram now!)  The shiny metal bit is a distinguishing feature of the “vikings” but it complicates re-covering terribly.  I might have drilled out the rivets, but two are also anchor points for the weather shield, and I wasn’t confident about being able to replicate a secure rivet that would endure a lot of use.  Now I have a tiny unsightly flaw around them though, and it is driving me batty.

One things remains to be done.  I made a pattern for the weather cover, but I haven’t cut the ikat or vinyl for it yet let alone basted or sewed it.  I have time before this stroller will be used, so that is on hold while I try to complete the pram before Mini grows too big for it!
IMG_0894.jpg

You can see how adorable the red is too and why I wanted to have the option to use it also and not ruin it?

Today yesterday Tuesday I began to pattern the bassinet hood.  It only took a few minutes of pinning muslin to it and tracing the edges, but then I had to stop for other chores and to spend time with Mini and L.  It felt pretty good to finally make even a little progress though.  Today or in the next few days I’ll continue.  I plan to make Tyvek pattern pieces from the tracings, cut pieces from the velvet, and complete the hood section before working on the body of the bassinet.  (I bought a roll of Tyvek long ago to make patterns, because it ends up being much cheaper than Swiss paper but more durable than paper.  I can’t stand the feel of paper anyway. A drawback is how opaque it is.)  The seat of the stroller uses snaps and design to be able to take it apart and even switch out the covers, but unfortunately the hood pieces do not allow for that nor does the bassinet.  Mostly it does disassemble fairly easily by removing three screws, folding away some metal spreader arm things, and it is nearly the same construction as the Hedstrom bassinet.  It will be a fiddly project but hopefully not too bad.  The biggest wild card to deal with are various rivets to replace with something as similar as possible or to adjust the design a bit.  I’ll see.  

Re-making Vintage Prams & Strollers Part I: a Hedstrom Bassinet/Carrycot

This is something I haven’t really found anyone else writing about: re-making/re-covering/re-upholstering old prams.  Although in researching them I’ve found some bloggers using older prams for their kids I haven’t seen anyone take one apart to revamp it with new fabrics.  That kind of surprises me!  Today I’ll talk about the first pram that I re-made, and then I’ll be posting about an ongoing project that I’m excited about.  The new project is unfortunately going to be subjected to delays thanks to lack of materials on hand and the impending arrival of Mini.  (She was due this past Saturday and is being evicted one way or another before this weekend.  While I’m very excited I’m also worried about ever finishing the newest pram!)

Prams and strollers/pushchairs, vintage or not, weren’t on my radar until I spotted an old Hedstrom in one of my favourite thrift stores a few years ago.  I didn’t need it.  I hadn’t known I wanted it, but once I found it; I did.  😀  Sure, I hesitated while the more sane part of my brain tried to win, but I kept pushing around the store as I browsed, it was only something like $10, and soon it was going home with me in hopes that we’d be making use of it some day.  I just liked how it looked, all metal and old fashioned, and I thought it seemed practical with the detachable bassinet and gentle rocking motion.  The fabric wasn’t so lovely and a bit crumbly, but I knew I could either clean or fix it up.  Once home the frame polished up nicely, and I began Googling old prams.  Right away I decided on using linen to re-make the bassinet, because I just didn’t like the knit navy fabric very well or expect it to last much longer.

543365_10151402842864756_1559025897_n

It was very difficult to select a fabric.  A somewhat lime green was my favourite option with a fairly muted red next in line.  Dusty shades of pink, green, and blue were runners up.  On the one hand I wanted to use a fun colour, but on the other I was afraid to have it clash with my outfit too often and also deferred to L’s preference and used the dull khaki green.  I still have the lime yardage and wish I’d used it instead, because it would have been a much more dramatic change and look, and this has influenced my choices for the new pram project.

150632_10151402843369756_915124798_n

Anyway, I have very few photos on hand from re-vamping the Hedstrom.  I tore it apart completely and jumped in with creating a pattern from the old pieces and re-builidng as best I could.  I had to replace the rivets with bolts and cap screw things, and sadly I didn’t make a matching cover to snap on, although I did include the snaps on the body to attach one.  I’m not sure what happened to the remaining fabric to make the cover.  😦  Everything was replaced except the frames and supports.  I used a fancy vinyl inside and to cover the mattress board.  The mattress support has a portion that snaps up into a seated position, which is nifty, and I made a mattress cover and pillow to match with the same green ticking striped cotton as the hood lining.  I was fairly pleased with how it all turned out.

Here are some recent shots:

Since then I’ve seen other similar prams, and I realised that I was missing more than the weather cover.  Technically the Hedstrom was complete aside from the weather cover, but plenty of other similar prams had seat attachments to turn them into strollers.  Shoot.  That’s far more useful!  Some brands and models are prettier, like the curvaceous and velvety Herlag brand I’ve only spotted rarely, some are boxy and less appealing to me, and some have a bit of a following like Emmaljunga’s “Viking” model.  As with most things like this I became a little obsessed, collected a few strollers, and still ended up crossing the river and a state line to pick up an early ’90s Viking frame, bassinet, and stroller seat set after seeing a particular listing on Craigslist forever at a steal of a price.  (I just couldn’t ignore it and let it go.)

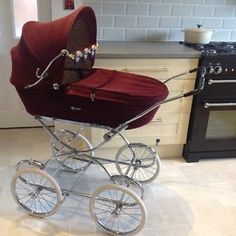
Not the best Herlag example, but I saw a shiny one just like it but in better condition that really looked amazing with the curves:

Oh wait, here is another swiped photo but of the shiny one:

98f60ee7a68820422c02a3232505622b--vintage-pram-buggies.jpg

I took these photos from an eBay listing.  If only I had unlimited funds and space I’d probably get a Herlag too… polished up it would be soooooo gorgeous!  *sigh*  This brand is by far the most elegant in my opinion, and I wish I could trade the Hedstrom for one.  The corduroy inspired me to use velvet for the Emmaljunga to get a similarly rich look if not the elegance.

Emmaljunga’s Viking is the only somewhat popular old stroller people are using out there, as far as I can tell, aside from hard-bodied varieties like Silver Cross.  They came in navy blue most frequently and sometimes forest green or bright red all with white vinyl accents.  Other models had some funky fabric and vinyl options especially in the ’80s.  While you can still buy new hard-bodied prams that look old the soft upholstered kind turned into a modern take before 2000, and it seems that Scandinavians were the last to do upholstered prams that would pass as more vintage to most eyes.  (Emmaljunga is Swedish, and more common to find, but Simo is a similar Norwegian brand with a few American strollers out there from the ’90s too.)

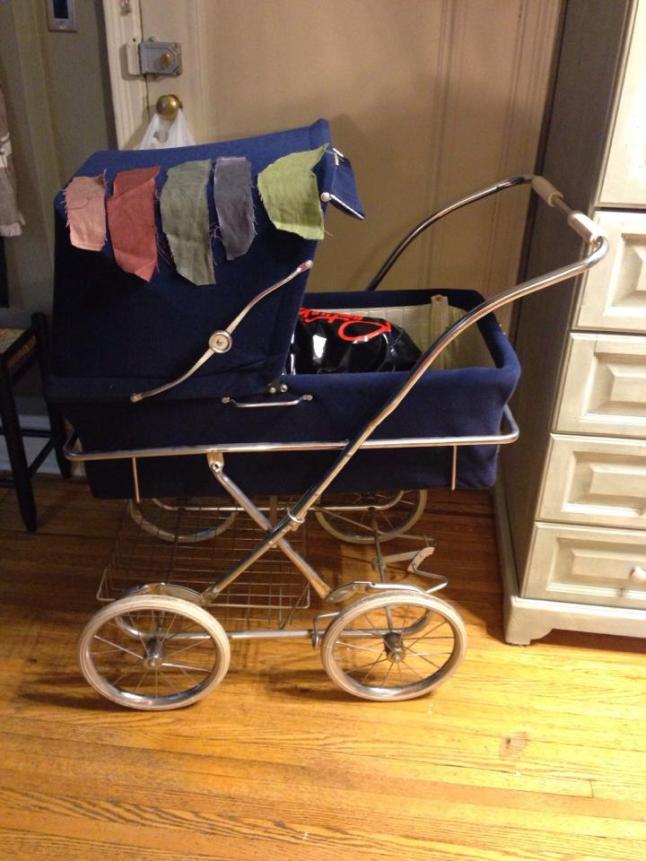
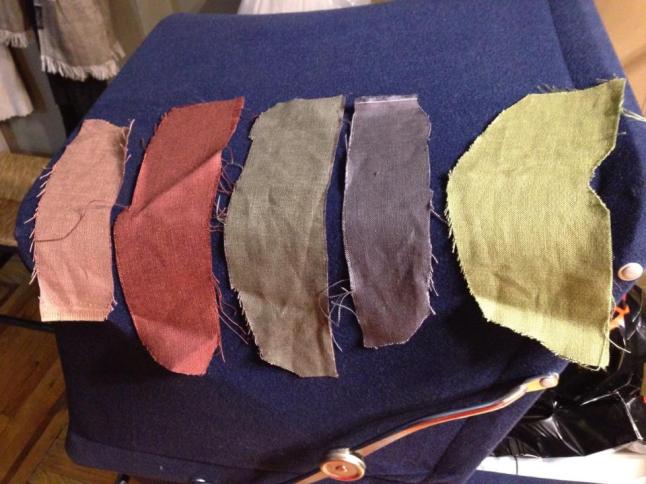
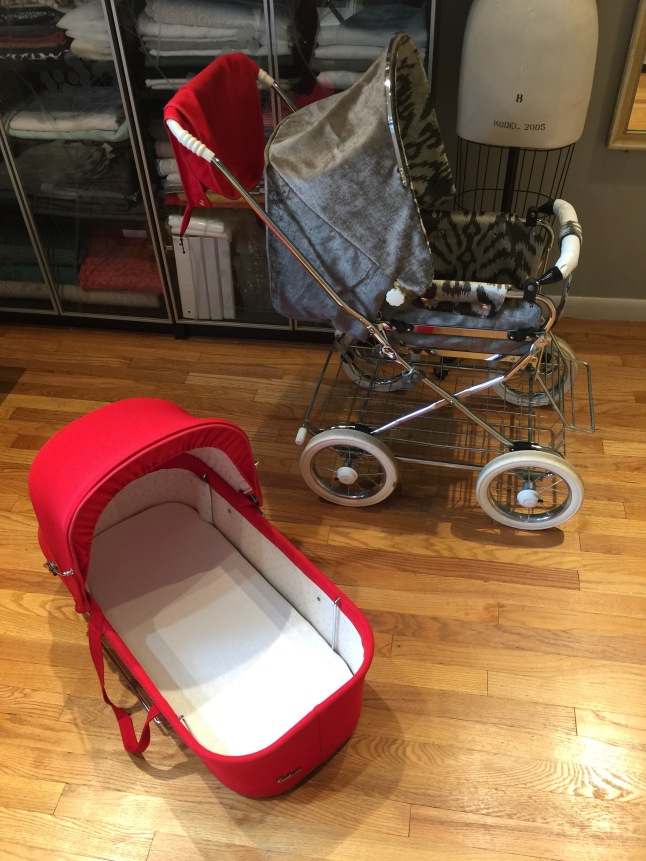
Here is sneak peek preview of the Viking project…  I made a lot of progress today and should complete the stroller half tomorrow.  The bassinet portion will be on hold indefinitely, which sucks, but I don’t have the time or fabric for it now.  Also, I’d banked on using a $15 “donor” seat and bassinet set in order to save and use the red whenever it suited my fancy, but that fell through.  😦  The carrycot is in better condition, so I can’t bear to take it apart aside from the time and materials dilemma.  Either I’ll never end up making the matching bassinet that I envision or it’ll be with a suitable one in poor condition later.  *Sigh*  It was going to be gorgeous.  So, hopefully I’ll get to write after I’m done tomorrow but for now here is the original red stroller and the fabric I’ve used to re-make it:

I do feel terrible about ruining the original red set.  Gah!  All I can tell myself, and you, is that the stroller seat/hood part of the set was somewhat ratty up close… even with a spot or two worn right through.  It was still super cute though, and original!  And I had a red and pink Haba stroller toy thing that matched it so well, and a quilted seat pad too…  Gah!!!  I’ll definitely be keeping an eye out for a replacement if I can ever happen upon one.  (The hood portion is all that I really need if anyone out there has one for some reason.  Well, the bassinet too if I want to re-cover one some day.  Anyway…)

Part III: Reupholstering & Refinishing a Rocking Chair

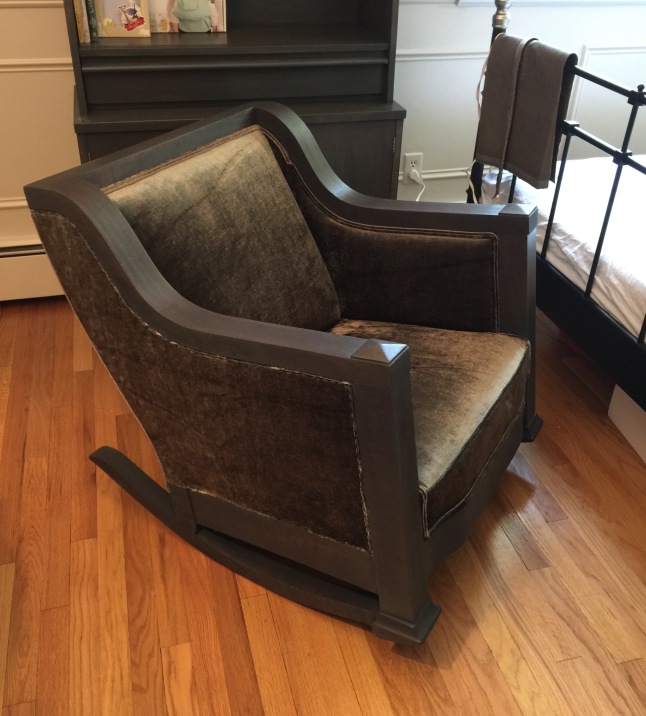
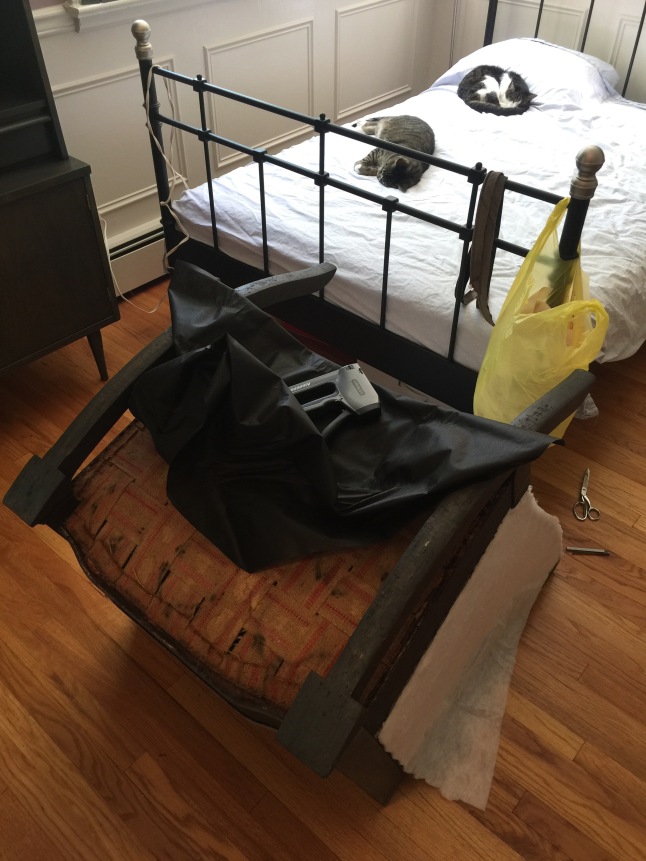
Slowly I am getting there.  The chair is nearly done.  I’ve found it necessary to rest too often lately, and it has really extended the timeline.  L has been working from home which also kills my levels of productivity thanks to a lot of interruptions and time taken to make meals that otherwise wouldn’t be happening.  I naturally have a harder time with my motivation when anyone is around besides.  Finally the end came into sight yesterday though, and I’m mostly happy with the way it is turning out.

In the afternoon I had to stop work early, and I was as far as having attached one outer arm section.  Today I should do the other outer arm and the back.  Then I could make and glue the double welt trim to completely finish… except that I need a lot more of the cord to do that.  (I selected a thinner kind than the big spool I have since the velvet makes it appear even wider.)  Drat, drat, Drat!  Tomorrow I have an appointment which is right by the store to get more, so I cannot finish it until sometime after.  I’m not thrilled about this, but I’m not wasting time and fuel today to go to the store when I have to be there tomorrow.

Here is yesterday’s stopping point.  Aside from missing the finishing welt on the edge it looks done from this angle, yay!

stopping point the 19th June 2017.jpg

You may notice a flaw that I regret…  When I pieced lengths of bias for the welt trim for along the inner seat I mistakenly switched the direction of the nap of one piece, and the light catches it very obviously.  I’m irked with myself for not catching this until I was in the midst of gluing, and for thinking that the bias would keep it from being noticeable.  It sticks out like a sore thumb to me, and I am past the stage where I could tear it off and replace it.  (I was too afraid to try this when I first realised only halfway through gluing, and it could have been a big issue pulling out staples from the narrowly trimmed edge and ruining that side, I guess… so, I’m trying to ignore it.)

Bits of bias cut velvet made into cording/piping for the seat and to border the outer back:

The piping gets sewn to one seat piece, and then you go over the stitching again with it sandwiched.  All the sewing is done with a double cording foot.

stitching seat deck pieces and piping.jpg

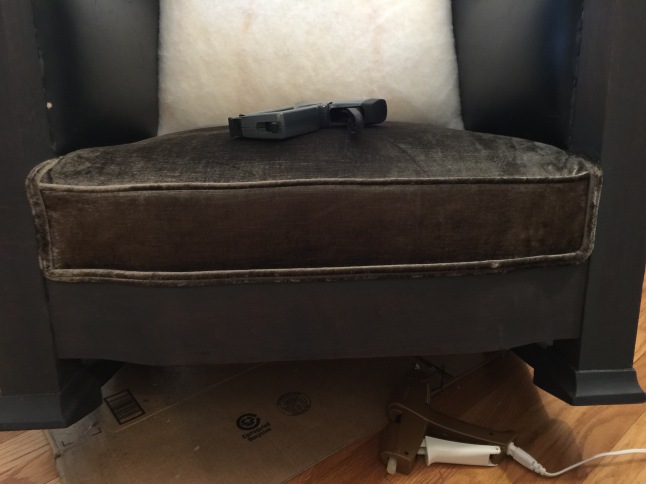
At this point I was excited to finally begin applying the pretty fabric to the chair.  I measured and marked where the piped seam should sit to make it easier and more precise to attach.  I’m not certain if this is correct, but it seemed like a good idea to hand stitch the seam to the line in order to keep its proper placement.  All my other sofas and chairs had separate cushions, and this is similar to what is done with the seat deck in those cases.  I didn’t want it to pull out of position as I stapled or to slide with use, and I hope it works out well long term. (Not only to look better, but using a curved needle really sucks and cramps up my hand, so it better be worth it!)

Stapling the seat and then finished off with welt:

IMG_5441.jpg

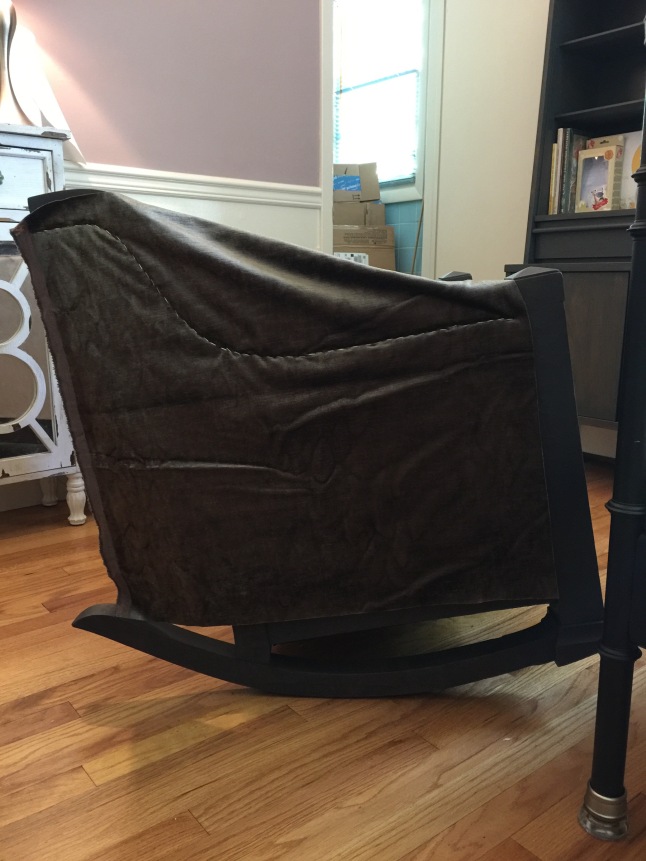
Inner arms done and gluing the trim:

Attaching muslin and dracon:

Stapling outer arm:

IMG_5585.jpg

At this point I realised I could finish off the bottom with cambric and didn’t have to wait until I have the welting cord or anything.  Yay.  The straps are all hidden and clean now.

IMG_5583.jpg

Waiting for another outer arm, the back, and finishing trim:

So close!  If only I wasn’t held back by running out of the cord!  I cannot even spend the rest of the day making pillows without it.  Instead I’ll probably install blinds and do other small tasks depending on my pain and energy levels.  Needing the space to work on the chair has kept me from pulling out the crib, or anything like that, and I could today… but I probably should wait until after our vacation that starts tomorrow just to avoid unnecessary cluttering.  Perhaps I’ll plan out the quilt(s) to figure out yardage requirements or even cut out a dress?  Or just spend too much time laying flat on my back to keep it from going into full on spasm, more likely.  Sigh.

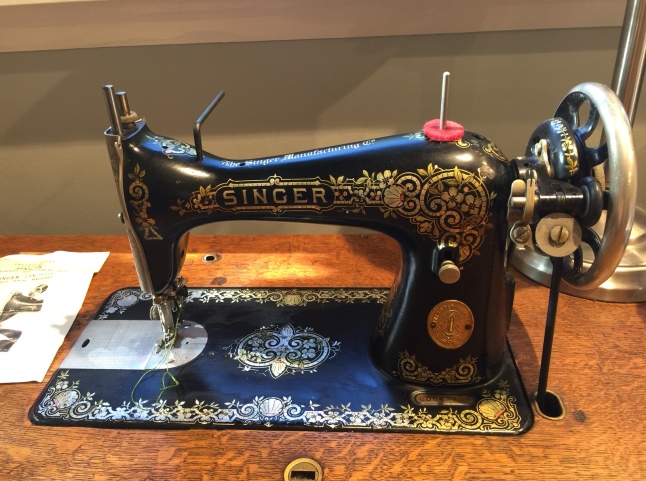
Singer Single Thread Embroidery Attachment 26538

I did not finish this post on the 5th of July  Heh!  Anyway…

Today (I am not likely to finish writing this tonight, the 5th, but let’s pretend…) I received something very special in the mail: a vintage Singer embroidery attachment.

Some ten years ago or more, I saw a very expensive and very interesting attachment on eBay sometimes.  Whenever they popped up the bidding wars began between the Featherweight crowd, and over time the prices only became worse.  I’d been introduced to the ingenuity of the old treadle machines, and the attachments produced for them, and I was on the hunt for more, but I just couldn’t swing the big ticket embroidery attachments at hundreds of dollars (at least not unless I would forgo the actual machines, treadles, and more basic attachments.  Priorities and stuff.)  However, I put it on my to-acquire-eventually list.

Now I have one.  W00t!

Not only is it a nifty old embroidery attachment capable of adding beauty to my projects, but it is the rare “single thread attachment.”  They are hard to find outside of eBay, can be extremely expensive, and are tiny little marvels of creation.  It never fails to amaze me how cleverly designed old gadgets and machinery can be.  (Forget boring computerised and electric stuff!  The workings of perfectly designed gears and such are so darned lovely!)  :Swoon:

There isn’t too much information out there about the single thread attachment (or its more interesting-to-see-in-action sister, the two thread) aside from a few videos.  April 1930s is a great resource for vintage attachments, and almost everything I know about 26538 is from her site.  Across the web there are a few short reviews, videos, and mentions, but I haven’t found anyone posting their work produced with the attachment.  I hope to fill in that void and eventually share some finished projects.  For now I do have a tip that may be of use to someone, because I while I was quite lucky to receive a working 26358 from eBay today I… uh, promptly mucked it up.  Luckily I was able to sort things out, and I truly think/hope that the solution will help someone out there eventually.

A shot of the 26538 all set up on my Singer treadle 15-30:

26538 on 15-30

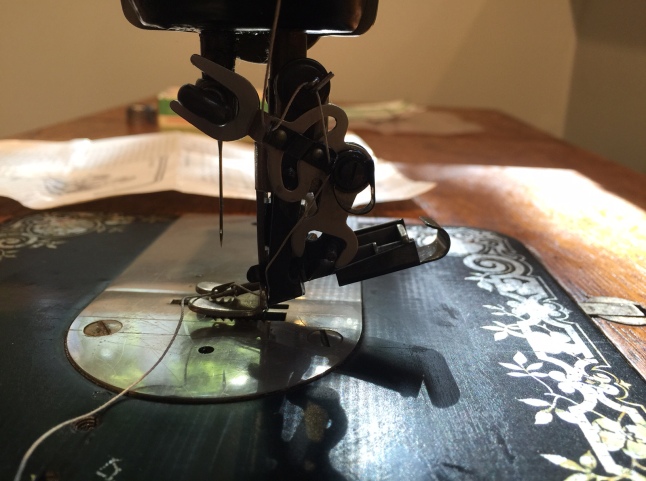
A view from the side:

side view attachment

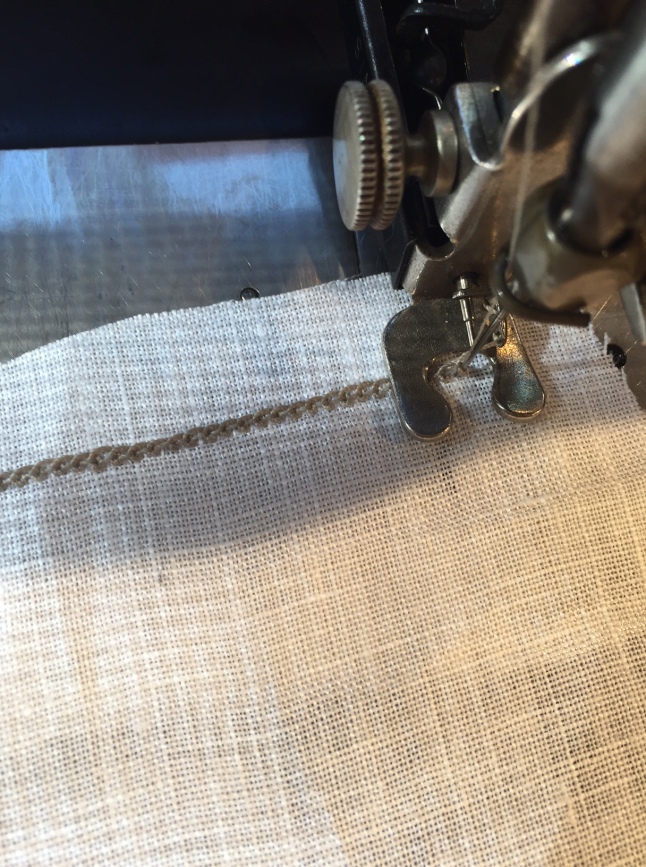
Close-up while I tried it out for the very first time:

stitch

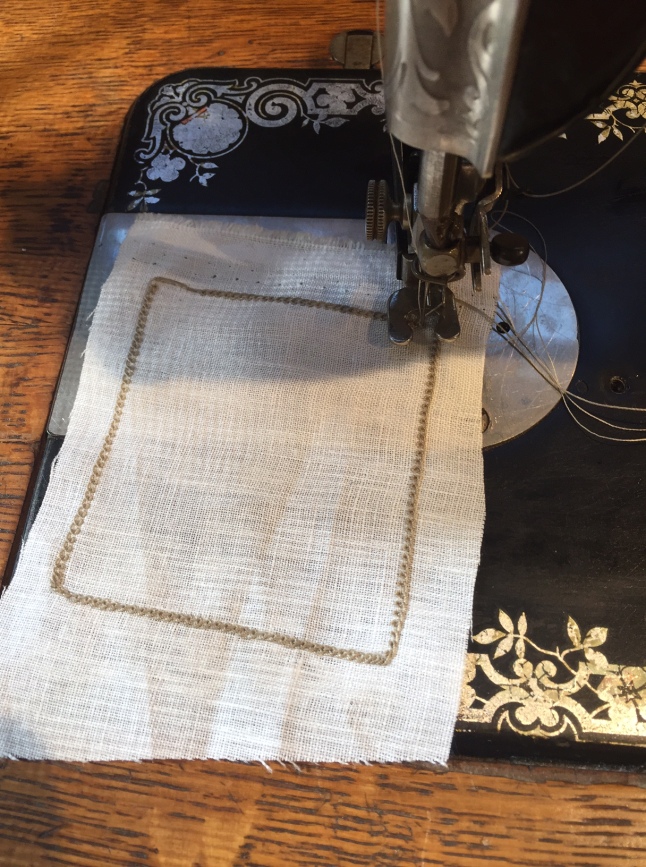
…and the very first sample:

stitch sample

Isn’t that stitch lovely?  I’m looking forward to using this to create pretty things!

Here is a silly video that I took showing how the attachment works and explaining how to adjust and fix it if you screw it up like I did.  I’m rather embarrassed by the video, but I was tired of trying to film, speak, and sew… and will have to live with sounding ridiculous.  😀


a Raised Garden Bed, Reel Mower, and Grilled Sliced Portobellos with Steak!

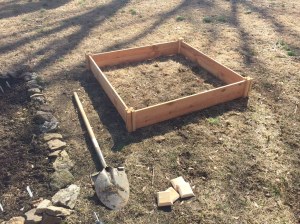
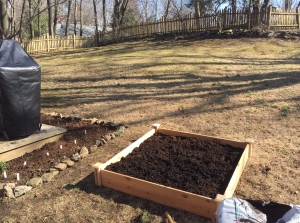
Yesterday was very sunny and warm!  Of course this meant yard and garden activity.  First I had to go buy some items.  When my friend was here she determined that the old garden bed was too shaded to grow things very well.  I am still going to use it, but I’m adding some raised beds in the most sunny part of our yard.  There is going to be very little sun once our neighbour’s trees have leaves, unfortunately.

So, I set out to buy soil, a raised bed kit, and some odds & ends.  I found that Home Depot had the most cost effective kits, so I planned on the 45$ one.  Once there I saw a  better option of 4×8′ which can be configured to a larger layout, but between the higher price that day and the cost of a lot more soil… I didn’t go for it.  Perhaps later?  I’m sure that it could be cheaper to construct raised beds oneself rather than kits, but… I just wanted to do it easily.  It only took a couple of minutes to set up, which was nice, but with a router I could DIY.  For now I am happy with the kit.

raised bed kit raised bed assembled and filled

Another idea was to use large oval tubs for the tomatoes and peppers.  I could put one on the raised section of deck along the house and perhaps another below, and they would look great, but they are rather expensive.  The 20$ round tubs, like the pair I have bulbs in, are also an idea, but I think that a single oval would have more usable space not to mention look nicer?  Maybe another year…  I don’t know if this is enough space for all my pepper and tomato dreams, but I suspect more room would be welcome.

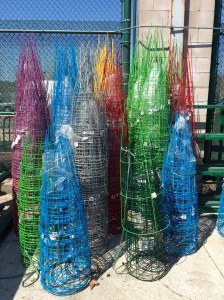
While at the store I saw these and thought they looked neat although too colourful for my yard unless perhaps I stuck to grey.

plant cages

I should have photographed the matching plant stake spiral things too.  They were neat.

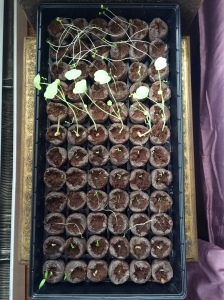
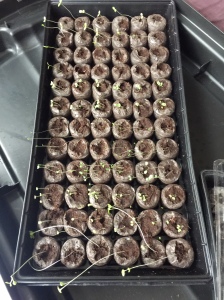
My seeds are growing well now, but a few bigger shoots have dried out or something.  Oops.  At least the most stubborn peppers are beginning to sprout.  Here are two of the tray:

seed tray starter tray

I ended up going ahead and buying a Scotts reel mower.  This was planned and researched even before we found a house to buy, but then the previous owners surprised us by leaving a gas powered mower between our final walk-through and closing.  Growing up we had a very big yard, and it was generally my job to mow for several hours on the riding beast.  Using a gas powered push mower seems intimidating to me and too loud and nasty for a small yard.  Still, I appreciate their generosity and expect it would be useful… except that there is a long flight of stairs from the garage to the yard, and I don’t think that I could bring the mower up myself.  That would cause a lot of logistical problems and probably some ill-will with my husband at times, so when I noticed that the HD price was the same as Amazon’s yet included the grass catcher and a slightly upgraded ball bearing design I went for it.  Very soon we’ll have to start mowing after all, and I had some store credit to use.

I assembled it and just had to try it out.  Luckily we have clumps of wild chives in abundance, and they were already quite tall.  I whirred around the yard, and probably made our neighbours worry about my sanity, mowing a dead-brown lawn.  Haha.  Then I emptied the grass catcher, strewn with chopped chives, onto my very new compost pile.

Using the reel mower wasn’t exactly as I anticipated.  It does make a noise, for one thing.   It also seemed heavier than I remember from the antique sort I tried as a kid, and since it is 20″ wide it certainly is larger (especially with the grass catcher attached.)  It may not be perfectly suited to our yard either, but then again the difficulties of our yard would also be an issue with the gas mower, such as the fact that the yard is a hill.  I really do think the reel will be easier.  At least it was fun, quiet, and novel.  Plus, if it was a slight struggle to take it down to the garage then I don’t want to think of how difficult the heavier and bigger gas mower would be!  The yard may have a steep slope and some tree roots, but it is so mossy that I don’t expect much grass to keep up with.  I’ll certainly write about the reel mower again after I have more experience.

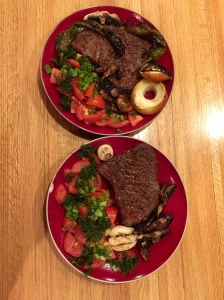
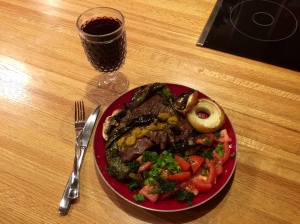
Last night I took advantage of the gorgeous weather by grilling steak, rings of onion, and sliced portobello mushrooms.  It was delicious!

supper from the grill grilled meal

The steak had nothing but garlic salt, fresh ground pepper, and MSG on it.  The mushrooms were salted and drizzled with olive oil after grilling.  I served it with a bit of my simple tomato salad (topped with dill) and in my case with a few dollops of homemade hot sauce.  Yum!