A Real Trash or Treasure Situation: Restoring a Mid-century Dresser (Changing Table)

Sometimes beaten up and mistreated furniture just cannot be saved, but sometimes a piece that looks almost certainly like trash can become a treasure with hard work and luck.  When I brought home the dresser, that I hoped to make into a changing table and storage for Mini, it did not look promising.  At all.

As I’ve written about before, I’d been keen to use this old dresser for Mini.  It was in the guest room of our house when I was growing up, and it was one of the only pieces of family furniture that I ever liked at all.  I took it to my first adult apartment and refinished it, but later I didn’t have a space for it, so it went into storage at the farm.  Then it was kept in a damp basement for several years and was nearly destroyed.  I still can hardly believe that I’ve managed to save it!

rescued midcentury dresser changing table

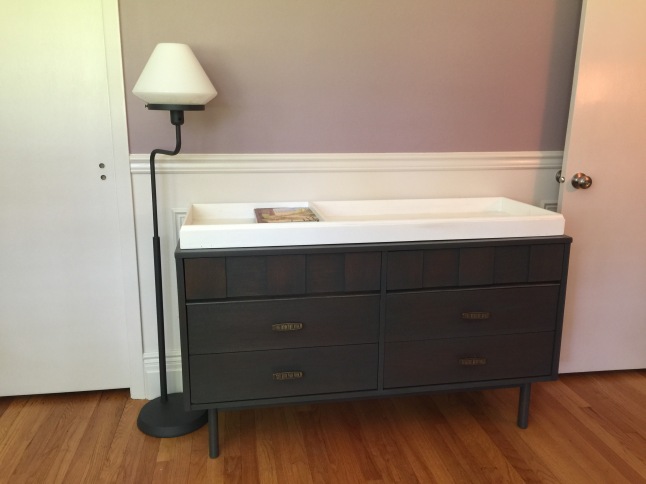
That is the dresser topper that I scored at the Restoration Hardware outlet for $20.  It was really a lucky find for the price and that it fits so well.  I hadn’t planned on using a topper, but it finishes the look and seems useful.

Here is the dresser when I picked it up from my Father’s basement:

trash or treasure dresser at dad's.jpg

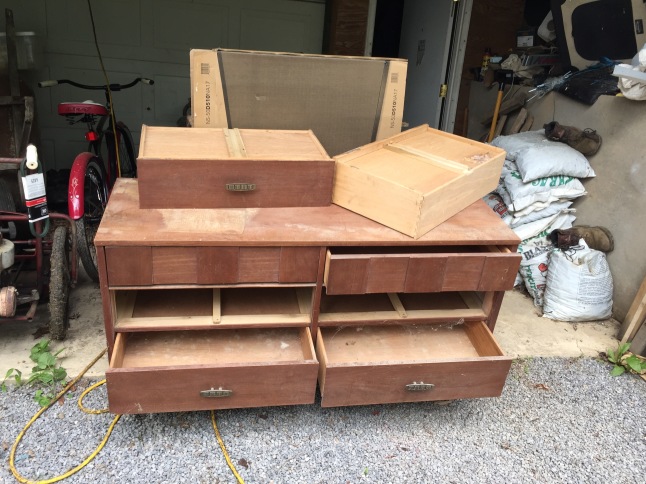
He had it airing outside in the heat for a day or two, but it was still warped and mouldy.  It was a sad sight, but I thought it looked salvageable.  Maybe.  We don’t have a very good vehicle for transporting treasures, so my mother was kind enough to drive me home with the dresser.  We’d planned it in advance, so I decided to go ahead and take it home figuring I could set it out for trash there if it turned into a disaster.

Soon I set about trying to clean it up and get it ready for repairs and staining or painting. Veneer was warped, separated, bubbling, and broken.   It was covered with mould inside, and the chipboard back was beyond gross from moisture and mould.  All the drawers were a bit stuck, but a few did not open or close at all.  Check out some of the mould…

IMG_3078

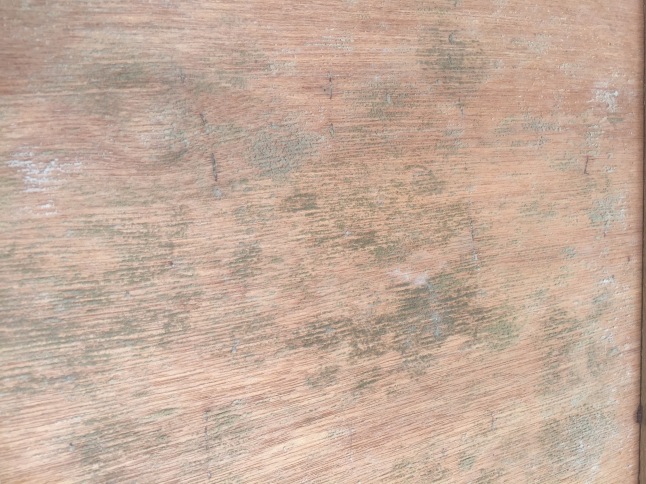
Photos did not adequately capture how bad the condition was, I think, and after really taking a look I was discouraged.  At that point I decided to slather every surface with Citristrip and wash every nook.  I’d deal with the effects of more water later, but I had to do something to clean it.  Also, I tore off the back having deemed it too nasty to save.

It looks pretty decent in the photos, but it dried a complete mess.  I was even more discouraged by now, and L suggested we toss it and buy something.  However, I’d already done a lot of work and hated to spend a few hundred dollars for a similar dresser off Craigslist.  Then I’d have to figure out a rental truck or something and go through the stripping ordeal again.  (None of my searches produced anything available less than an hour or two away, and everything was a few hundred dollars.  Bleh.)  So, we carried it upstairs where I could continue work where it was clean and dry.

Thus began days and days of gluing.  I have a handful of clamps and some scrap wood to hold things tight while drying, and I had to keep doing bit by bit.  Besides, one can only glue certain portions at a time anyway.  Every day I’d glue some section as soon as I woke up, and I’d do another round or two by the end of the day.  Some parts only required a squirt of glue and clamping overnight.  For the thinner veneer I had to use a pin to squeeze glue into the layers.  The two bottom drawers practically disintegrated, and I had to carefully rebuild the plywood itself!

Some week or two later I finally was done glueing.

The original handles are pretty cool, I think, and they cleaned up fairly nicely.  I waxed them to prevent any more corrosion.  Usually I avoid brass/gold toned metals, but this should go perfectly with some little stamped brass covered tables that I have already.

midcentury dresser handles.jpg

During the glueing process I had also been painstakingly sanding the drawers and rails so that they would slide smoothly and open properly.  I nearly replaced the rails with drawer slides, but I didn’t want to deal with installing them or spend the money either.  Luckily sanding and planing made a huge difference, and I am glad to have the original mechanism.  It sure was a pain, but it helped that my sanding block fit perfectly in the groove on the drawers!

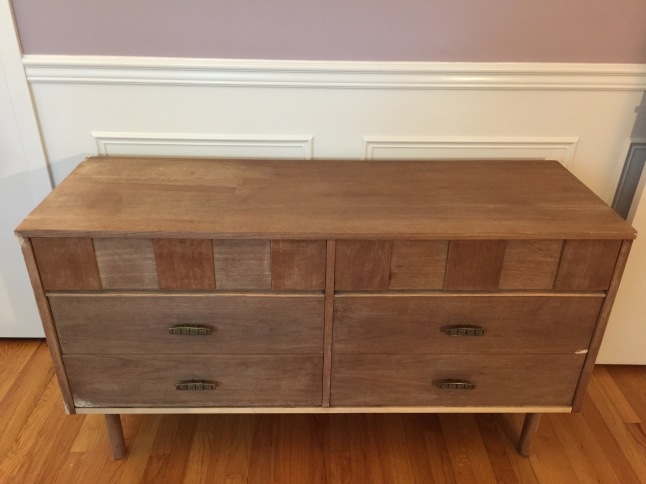
Next I nailed on a new back and filled in the missing portions of veneer with stainable wood filler.  I had hoped to use stain and not resort to painting, and by now I thought that the veneer looked decent enough to.IMG_3128.jpg

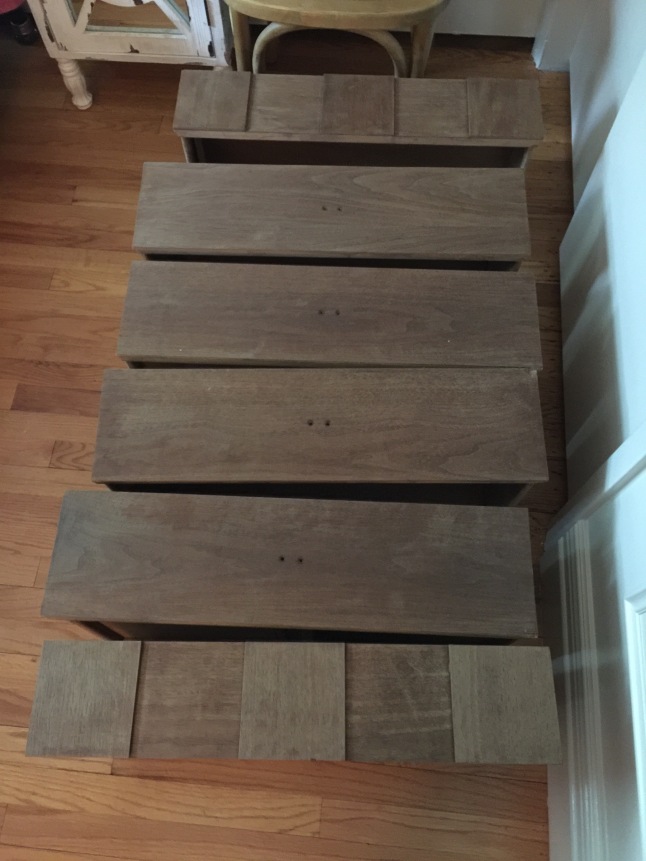
All ready for stain.  You can see that one entire veneer strip was gone:

IMG_4106.jpg

Choosing the stain was a tough decision.  On the one hand I wanted a nice light pickled oak whitewash sort of look or especially classic grey, but I wasn’t sure the condition was suitable or how well I could get it to turn out.  L prefers a really dark finish on furniture, so I considered ebony stain or doing a wax and stain treatment like our dining and coffee tables which are meant to look sort of Restoration Hardware.  At the store I also saw neat colourful options, but I was too afraid of adding yet another colour to the room yet.  (I’m full of regret about the purple-pink walls.)  Carbon grey looked nice and became a contender too.

I agonised over the choice in the store and at home.  L voted for the carbon grey, so I tried it out, and also the ebony, on hidden areas.  The wood inside of the dresser was different, but I could see that ebony was not at all forgiving of any variations in tone.  I suppose classic grey would have had the same limitation, and I went ahead with the carbon grey once L saw a photo and loved it.  All along I had reservations, and even with it complete and looking good I still wish, just a little, that I might have chosen another finish.  I do like it very much, but there is always the thought of what could have been if I went in a different design direction, you know?

All stained, including the hidden parts of drawers!

And clear coated with polycrylic:

L absolutely loves it and is nearly in disbelief that I made this happen with such a piece of junk.  I’m quite pleased with it also.  Yesterday I stripped the lacquer off of the rocking chair, and I’m pretty sure I’ll use the same carbon grey stain for it.  The only reason I might not is if the fabric doesn’t go well with it, but even then I’m more likely to get new fabric.  The wood of the frame will not cooperate with the wax/stain Restoration Hardware inspired treatment, but carbon grey will work very well and match the dresser.  Anyway, that is the next project calling my name even though I should really be doing trim paint and a few other things first instead.  Yet I’ve begun to work on it to take advantage of the creative energy, because I’ve been feeling very tired and not motivated lately.  Then today I was up at 6:30, so I mowed the lawn and removed the storm windows from Mini’s room in order to repair them and the windows.  I’ll replace the screens and paint this week, and I already scraped and glazed one of the three windows before it became too hot this morning.

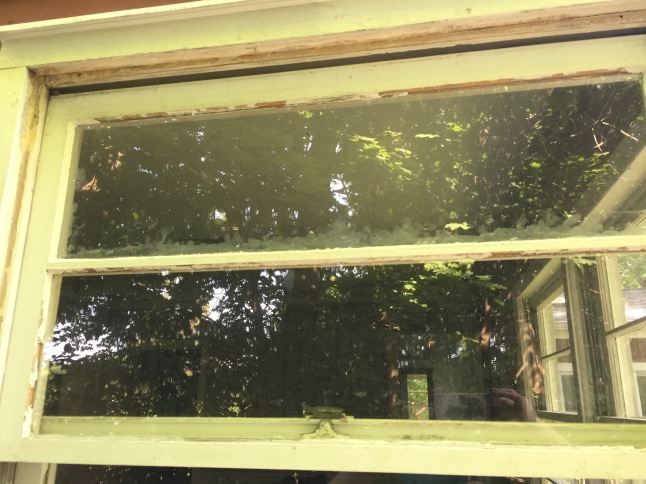
I didn’t think to take a before of the storm windows and their metal screens, but here is a shot that shows them well enough.  You may see a difference compared to the smaller window to the right, because I took it apart last fall to replace the screen with modern stuff.  It is less noticeable and looks far nicer in my opinion, but I wish I could have made the metal frame look better too.  I did my best with steel wool but it didn’t make much difference.  Perhaps one day we will buy wooden storm windows to replace them or even have the original windows switched out.  I HATE to use modern windows when the old kind look far, far more lively and attractive, and can be made efficient with storms, but the truth is that these were never good quality and aren’t in great shape now.  Maybe we can find replacements that keep the style and upgrade the quality?  I’m sad that a few other windows were replaced with very generic ones by the pervious owners.  It changes the look badly in the front of the house.

Before of the storm windows:

storm windows.jpg

Right after removing the storm windows.  Dirty, but they sure are more attractive without the sturdy and practical metal storms.  I’d leave off the inserts for the summer if I could, but they also provide the screens:

Scraped and looking like complete crap:

scraped and ready to glaze.jpg

Beginning to glaze:

glazing.jpg

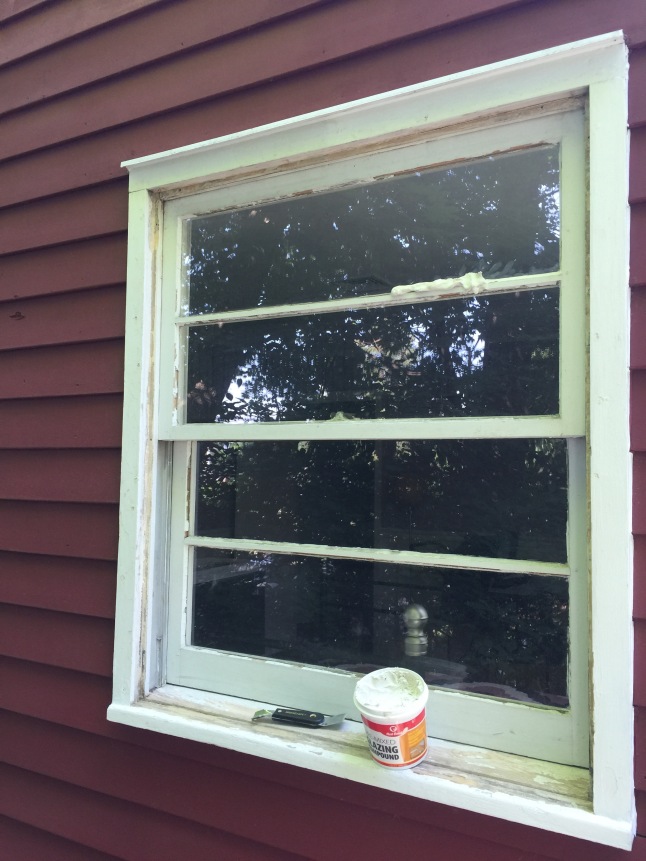
Finished glazing one whole window!  Of course it still needs to be cleaned up and painted, but I’d say it has improved already:

glazed but not cleaned or painted.jpg

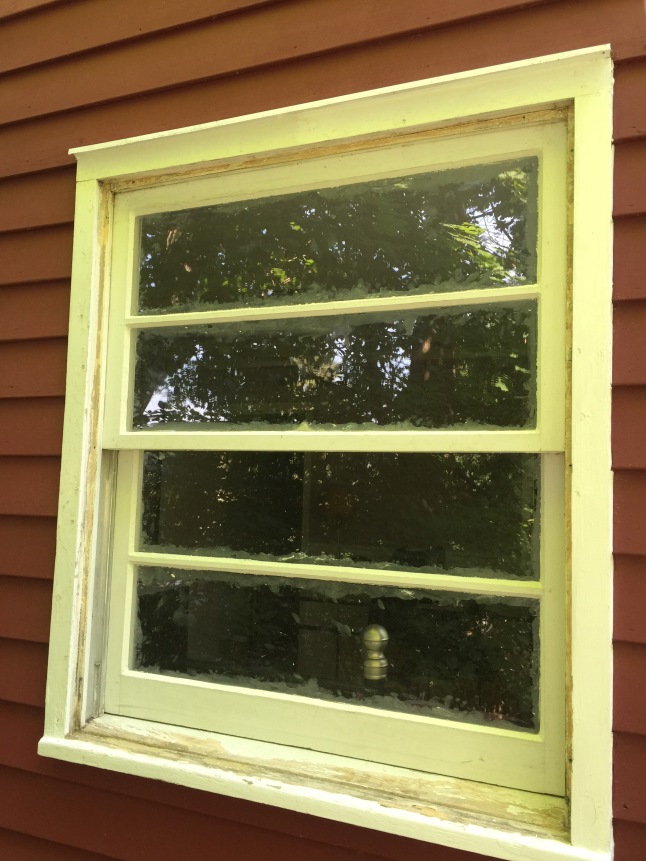
The glazing went much better than the first windows that I worked on last fall.  Perhaps warmer weather improves the flow of the glazing compound?  It felt like I’d really improved my technique since it went so quickly and easily, but I’m guessing it was really the heat.  😀  In the fall I didn’t quite complete the job, but I think I’ll get to those windows too.


Today I made some changes and updates to my lengthy to-do list, and here it is in case you would like proof of my insanity…

13th of June to-do list:

Front of house
-Patch broken front steps.
-Paint foundation a more pleasing shade.
-Buy new light fixture and install with sensor bulb.
-Last bit of patching.
-Last bit of painting.
-Wash windows (uninstalling and reinstalling storms.  Make screens??)
-Finish glazing windows

Mini’s room
-Brush final trim coat on nursery panelling.
-Remove storm windows
-Disassemble, and replace screens.
-Scrape and glaze: (One,) (two,) (three.)
-Paint exterior windows.
-Reinstall storm/screens.
-Remove security crap from windows.
-Patch.
-Paint windows (interior.)
-Change light switch and cover plate.
-Buy floor lamp.
-Buy and install shades.  Or make some.
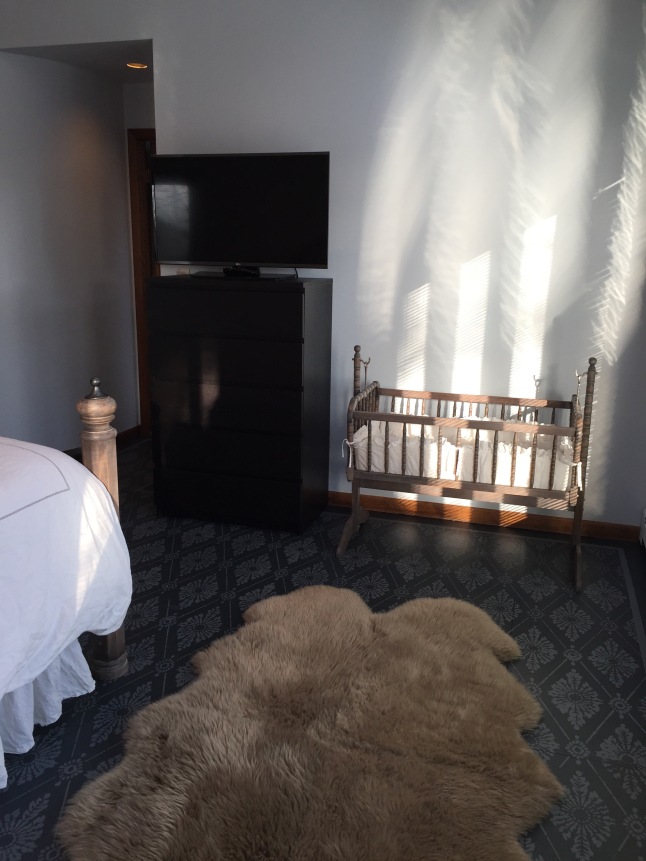
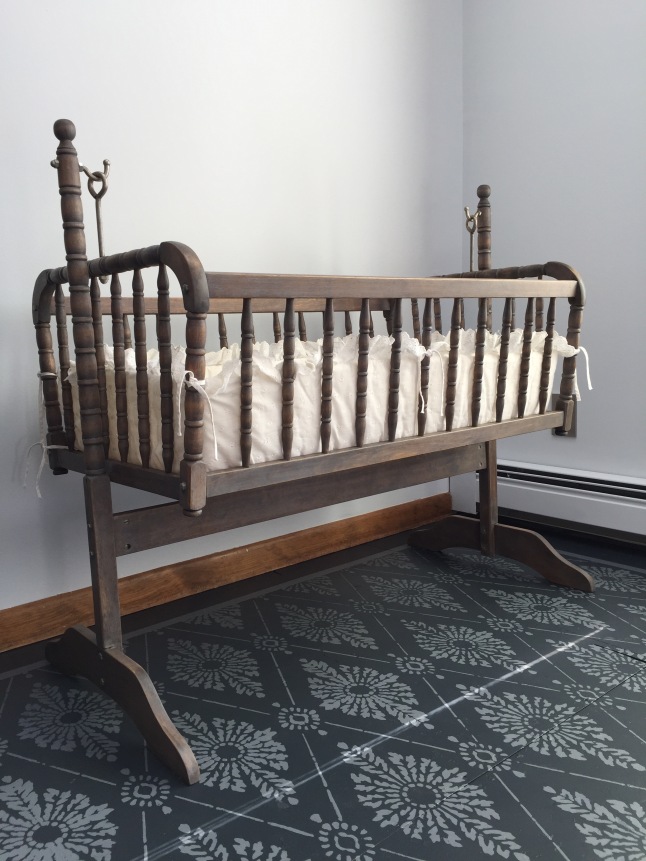
-Have crib sandblasted and finished or do clear coat.
-Attach casters to crib.  Create replacement hardware.
-Attach casters to walker and assemble.
-Bring dresser from Dad’s and refinish.
-Sew Kirghiz felted carpet to a dowel for wall-hanging.
-Strip rocking chair.
-Sand rocking chair.
-Stain rocking chair.
-Reupholster rocking chair and sew pillows.
-Fix leaky sink valve.
-Set up furniture, wall art, and organise.

Main living areas and stuff
-Replace certain outlets, switches, and cover plates.
-Paint dining/living windows.
-Scrape messy paint.
-Finish painting kitchen trim and panelling
-Repaint living/dining ceiling.
-Apply sealant on entry and hearth tile/grout.
-Sew back of sofa.
-Staple cambric.
-Sew pillow covers.
-Finish sanding dining chairs.
-Stain and wax chairs.
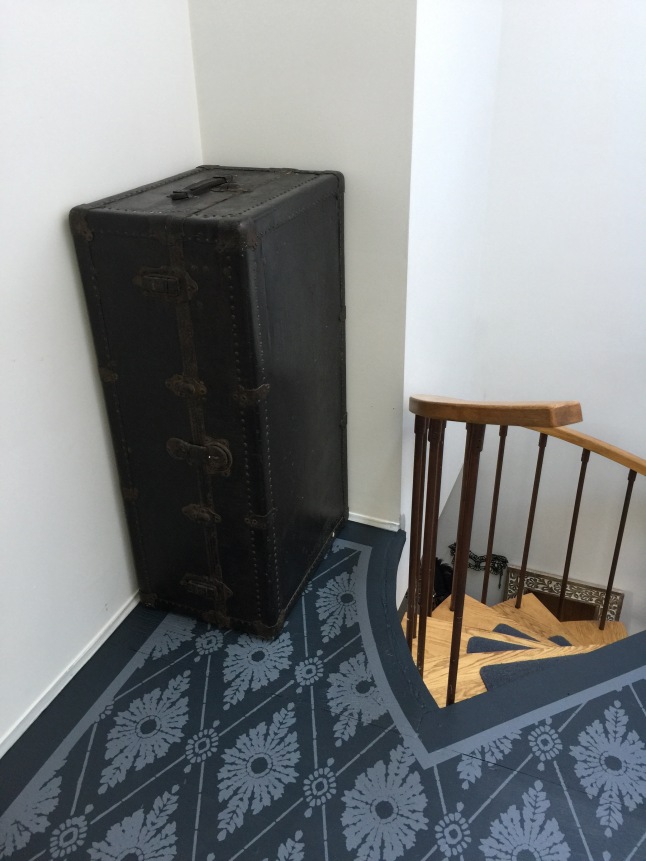
-Paint and Mod Podge antique travel chest.
-Touch up kitchen chairs and hoosiers.
-Repair coffee table.
-Repair and sand end table.
-Paint to match coffee table.
LATER:
-Reupholster recliner.
-Reaupholster little round chair.

Exterior
-Stain east side of house.
-Stain or hire west side of house.
-Powerwash patios and chairs.
-and paint rusty table with hammered finish.
-Stain patios.
-Permanently attach umbrella to deck with bolts.
-Powerwash fence.
-Stain fence.

Unfinished part of basement
-Finish painting walls.
-Rewaterproof spot on floor.
-Touch up floor paint.

Organisation
-Organise storage area.
-Organise basement.
-Organise Garage.
-Organise attic.
-Organise kitchen.
-Organise sewing room.
-Organise baby items in closet.
-Organise master closet.

-Have yard sale.

Dressing room and spiral stairwell
-Touch up ceiling paint.
-Shift PAX and MALM to left.
-Patch.
-Brush edges.
-Roll walls.
-Paint trim.

Sewing room
-Remove sewing room door.
-Mark and chisel hinge mortises.
-Mark and drill door knob.  -Install knob.
-Hang door.
-Paint door.

Other kinds of non-house projects 
-Remake lamp shade for hanging lamp in Mini’s room.
-Remake a play mat and arches for hanging toys
-Stain and make a busy board for Mini
-Sew dresses for myself; light coat for myself and Mini; dresses, pants, and quilted coats for Mini; a small quilt; sew some soft toys; …
-Crochet or knit sweaters, hats, pants, and booties for Mini
-Make a mobile?

Pushed to later:

Master
-Caulk.
-Paint master ceiling.
-Touch up master bath vanity.
-Recoat walls.
-Poperly hang mirror.
-Install tub trim kit and drain.
-Install shower trim kit.
-New switches, outlets, and cover plates.

Storage room (now office)
-Remove stored items from storage/office.
-Rip out carpet and pad.
-Remove panelling.
-Patch and caulk.
-Prime.
-Brush paint.
-Roll walls.
-Paint sewer pipe with hammered finish.
-Paint ceiling.
-Change light fixtures.
-Change outlets and cover plates.
-Frame the two cinderblock walls
-Install foam insulation panels
-Drywall or panelling…
-Prime and paint newly insulated walls

Media room
-Get rid of giant speakers and console.
-Mount TV and sound bar.
-Rip out crappy laminate.
-Remove trim.
-Install DryCore.
-Lay insulating underlayment.
-Install vinyl planks.
-Reinstall trim.
-Paint touchups.  (I did re-paint a lot but need to finish since I ended up using a new gallon that doesn’t match perfectly.)
-Arrange furniture.
-Paint or replace stained ceiling tile.  (or ideally change to 2×2′)

Stencilling a Subfloor: a budget friendly makeover

Ah, this was a project I planned to tackle before we even moved into our house just over two years ago.  How time flies!

img_9598

Perhaps you’ve already read about my first stencilling project?  Well, I knew that the solution to the stained (and in my opinion very unappealing) master suite carpeting was to rip it out and stencil just like I’d done to the apartment kitchen.  I even decided to stick with the same colours  and pattern!  According to the mix information I purchased the paint for this before we even moved… and here I am finally done with it.

I began tearing up the carpet on Monday the 13th thinking that with luck I could be done for the weekend.  Ha!  I just completed it on Thursday and only did so by opting not to clear coat.  (I’d wanted to do everything properly and thus apply several coats and let it dry for days as directed, but that meant not stepping into the room until next week, doing things in stages thanks to furniture issues, plus a lot of work… nah.  It’s good.)

Here is a before picture showing the carpeting.  It seems I did not take many photos of the room before we moved in, and you do not see the brown mystery stains here.  Any shades of tan, beige, and brown have never been my thing, and by the time I finally began tearing it out the carpet had additional pulls and damage.  It was beyond time to go.

img_5290

It was easiest to start inside the closets, and oh look!  A mystery stain!

img_9323

The padding underneath was actually really nice, but it had to go since I wasn’t about to put in another dust collecting carpet.  Annoyingly, previous workers had been rather careless with spackle and paint which left the floor a bit lumpy.  I didn’t want to try sanding anything though, because with the plywood it seemed weird to.

This was a lot of work, and I didn’t quite finish removing the carpet on day one.  I’d begun thinking it was perfect timing to bring the trash out for collection the next morning, and it ended up being 12 contractor bags full at the kerb not counting what was still on the floor when I quit for the evening.  At this point I may have been having a second thought or two.  The were about two million staples to find and pull up!

Last time when I stencilled the apartment kitchen floor I neglected to prime first.  That was not to be skipped now!  When I was nearly done brushing it on I noticed that the can said it wasn’t meant to be used on flooring.  Oops.  Perhaps it would have been better to stick with only the floor paint after all and no primer?

It looked a lot cleaner after priming anyway.  The next day I brushed on a few coats of the base colour.  In the apartment I’d regretted having the edges dark since it showed dust bunnies too well, but I ended up doing the same thing here with the navy blue exposed at the edges.  Actually, I was very close to switching to the grey except that I’d already completed the cutting in and taping for the navy.  In the end I suppose it works out better in this case to have the darker one at the edges to disappear better under the heaters and disguise imperfections?

I filled in most gaps which included rough cuts around doors and a lot of gaps in the landing area.  I’m unsure why they never installed any trim there and had to add some myself.  I really don’t like quarter round and always opt for cove moulding instead.  Rather than wood I used the foam stuff thinking it would curve with the “tower” wall, but the piece I had ended up snapping around a nail, so I filled the wide gap instead.  Eh, it works?

Previously I had made a painted border, and I wanted to again, because I think it looks more complete with one, but I was intimidated by the idea of taping a curve.  Whether this room would end up with a border or not was up in the air until I actually attempted to tape.  It wasn’t bad at all with just a bit of care and finessing.  I was rather proud of myself!  😀

The navy had an entire holiday weekend to cure before taping and stencilling.  I only eyeballed the distance from walls and tried to account for projecting bits of trim to balance with the baseboard heating units.  No portion is perfect, but I am entirely pleased with the results.

It was at this point that I considered switching to grey for the outside border, but I’d not trimmed the tape or planned for that.  The navy matches very well with the bits of carpet on the stairs too, and that helped me decide to keep it as the main colour.  So, another line of tape was added within the perimeter of this.  Just look at this!  So proud!  😀

Before quitting for the day I wanted to complete the border by brushing on the navy to seal the edges and then two coats of the grey.  I peeled up the inner tape before anything dried too much in hopes that it wouldn’t lift any layers that weren’t supposed to.  Success.

In the kitchen I’d measured and begun the pattern symmetrically, because the room was narrow.  Here I decided that the most important focal point was the space between the entry door as one walks up to the landing, so I began there.


This is how far I made it the first day:

And finally I was done late on day two and just barely with enough paint in the tray for the last bit:

img_9577

Working on a much wider room was a challenge, and I had a difficult time keeping the pattern on track.  It isn’t perfect, but I’m still quite pleased with everything.  Here is the tour starting with the landing:

img_9553

Standing in the corner is one of the steamer trunks that my paternal great-grandfather used when he left Slovakia in 1900.  Each of my uncles has one or two, I’m told, and my parents had two but kept this “uglier” one in the damp basement (and mum painted the “nice” one, sigh.)  I rescued it a couple of years ago, washing and waxing away rust and mildew and treating the leather, but the bottom (back here) is falling apart.  😦  It is a fairly awkward item to keep around, but I don’t want to lose a rare bit of family history, and so here it lives.

Last fall I scored an older one, with at curved top, free from a neighbour after it didn’t sell at their yard sale and about to be tossed!  It is also in less than excellent condition but has a nice look with neat metal reinforcements at the edges and lovely bare wood. I’m going to let it dry out this summer then preserve it.  I’ll be sure to write about it here.

img_9591

img_9595

img_9598

img_9600

img_9602

img_9610

img_9665

img_9641

img_9659

For the photos I decided to set up the cradle that I refinished to match the bed (which I also stained and waxed to have a greyed Restoration Hardware look.)

img_9622

img_9623

L and I are much happier now with the room and feel like it finally has our style.  I’m also glad to be rid of the dust-trapping aspect of carpet and look forward to a much easier time when vacuuming.  The only thing that I might do something about are the closet doors and trim colour.  It would be a pain, but it could be worth gel-staining the wood to a darker tone?  I’d really like to paint it but think that would be a shame to do and will not, but a deeper shade could make a big difference.  The trim already looks significantly better here than it used to having been touched up to hide strange fading and wear.  As for the doors, they are loud and feel flimsy.  Depending on measurements I could rig up some Ikea PAX sliding doors or something one day?

Next I’ll have to finish painting the bathroom.  Colour goes a long way, and paint disguised the nasty formica-like vanity, but one day we hope to renovate it.  I’m sure that will be many years from now if ever, but it doesn’t stop me from envisioning marble tile and some sort of wonderful tub.


Refinishing: a Rustic Farmhouse/Tavern Trestle Table

Yesterday I completed another project: refinishing an old dining table.  It took two full days, but now it is in place to keep guests from knocking their heads on the light fixture that was otherwise randomly dangling in the middle of the room.  The chairs to match are not on my list until I can work on them outside.  I’m afraid they’ll be slow due to having more nooks and crannies to deal with.  Anyway, the set is supposed to match the Restoration Hardware style coffee table that I wrote about not too long ago, and I used the same method of waxing and staining.  So far so good, because they do match well enough to my eye.  I’m so pleased with the table that I can’t help but admire the grain and imperfections while running my hand along it every time a walk by.  😀  It turned out much nicer than the coffee table.

This table is very heavy and is made of some sort of dense pine which I can still smell any time that I’ve sanded it.  It is not the first time that I refinished it, just like the the coffee table, but it too was stored for several years on a porch.  (My dad’s.)  Last time I simply sanded them down, stained everything uniformly dark with ebony, and polycrylic coated it all.  Obviously my taste has shifted a bit since then.  The table is embossed underneath with “Hecho en Mexico” along with a mark that I want to look up.  Some years ago it was given to me by the super of the building that I lived in, because he said I’d appreciate it after seeing the coffee table.  He told me that some tenants had abandoned it when they moved away and that they had brought it with them from Russia.  Who knows what the story of the table really is, but I’ve had it ever since.  My husband has always been particularly fond of the table, but we didn’t have a place for it.  Now that we have a dining area it was time to bring it from my father’s porch and get to work.

Before sanding:

rustic table before top before

After sanding and beginning to wax:  (I still think that a little more sanding and then only clear wax would have been gorgeous if our floors were dark!)

all sanded sanded basebeginning the waxing

The process was the same as with the coffee table.  After sanding and going over it with a brass brush, I began with liming wax and clear wax, then stained with ebony, waxed again a few times, left it overnight, sanded a little, and then waxed for what seemed like forever finishing with the clear.  It turned out slightly different than the “antique coffee” look of the coffee table, because I ran out of the clear wax that I’d been using and bought some that was different.  I cannot find that one to link to, but it was very soft, melted rapidly, and it did not give a hard finish.  Perhaps that is the cause of water ring trouble too, and overall I recommend the Minwax now that I’ve tried it.  It hardens and works so much better.  It is a really lovely result with an amazing depth to the grain, but I haven’t tested it for water rings yet.  As for the coffee table I ignored the label and Home Depot employee’s advice by applying rub-on polycrylic in spite of the wax.  (I cannot find that on Amazon or Home Depot either, sorry.)  I tested it on the edge, and since it didn’t appear to be a problem applied a couple of coats to the top too.  I sure hope it solves the water rings!  Last time the brush-on variety worked perfectly, so fingers crossed.  I did this before discovering how gorgeous the Minwax paste made the dining table, so it was too late to apply.

Here is the result of all the hard work:

rustic table done base detail

finish 4finish 2finish 3finish 1

rustic table

What do you think?  Let me know in the comments!

Project idea: antiqued mercury glass mirror (Part I)

This post actually began as a comment on another blog, but it was getting too long.  I also really want to begin writing about it while the idea is fresh as Part I of an eventual project.  I’m really excited about it!

The blog post that inspired me was at Happy Day Andi, and I began to comment: “This gives me a great idea to recreate a mirror I really liked but couldn’t afford!  It was made of a bunch of 12×12″ squares with little pressed glass bits at the meeting of the corners…”  At which point I realised that I had too much to say.  Time to make it a two post day.

A few months ago I saw a huge Belle Epoque mirror at the Restoration Hardware outlet, and I wished to win the lottery.  Even damaged and discounted it was hundreds of dollars, and I had a glimmer of an idea to copy it somehow.  I mean, it was all just glued together, and the tiles of the mirror reminded me of fairly cheap ones gracing the wall of a flat I once considered renting.  Surely I could glue them to a board and stick similar glass bits over the corners?  However, when I Googled in search of something to use as the key accent pieces nothing really stood out as an option.  I abandoned the idea.

Then I read about DIY mercury glass, and suddenly making a similar mirror seemed like a good notion.  Perhaps I’m just feeling more creative today, but I’ve even come up with faint ideas for the accent bits.  Pressed glass buttons, perhaps?  I’ll figure something out, so stay tuned for Part II eventually.

Refinishing a coffee table: Restoration Hardware wannabe

I love a lot of things at Restoration Hardware and dream of having such furniture, but it sure isn’t budget friendly even at the outlet.  (I used to live in walking distance of one which was really great!)  Since I enjoy refinishing, and buying or finding treasures to transform, I’ve tried my hand at Restoration Hardware style finishes a few times already.  One day I’ll post about the bed that I did a few years ago, which was the first such project, that was done with a very different technique.  Today I sanded down an old coffee table to use again after it was stored on my mother’s porch for several years, and the goal was to have people think it might be from Restoration Hardware.  I think I achieved my goal, but tell me what you think.

Before:

Before after years of exposer to elements

So, RH has a few round tables that have a similar build to my old coffee table, which I found about a decade ago at the Salvation Army on the upper west side in Manhattan.  I think it was around 40$?  In general I adore the “antiqued coffee” and “antiqued natural” finishes at RH, but the greyed woods and smoked oaks are lovely too.  I have a couple of dining chairs from the outlet in smoked oak and scored an amazing “Empire” armoire a year or two ago in “antiqued natural” for about a quarter of the retail price.  (It was damaged, but I could fix it.)  My idea had been to keep it a greyed and weathered look, because it was already sort of there, but it needs to tie in with other items in the living-dining room.  Thus I settled on a darker look sort of like “antiqued coffee,” but perhaps a bit more grey, because I love greys.  😉  Later I’ll be refinishing a dining set to match, and when I finally reupholster the sofa its woodwork will get the same treatment.

Sanding took a long time.  After sanding I vacuumed it, used a brass wire brush to open the grain, vacuumed again, and dusted with a tack cloth.  Here it is prepared, with sliders attached, all ready to stain:

all sanded

It looks pretty nice just like that, doesn’t it?  RH has many things finished like this, but my husband really prefers dark wood, and I didn’t think the light, unfinished style melds well with the flooring and other furniture.  😦

I’ve used other methods and finishing materials in the past, but this time the steps were as follows:

Wax with Briwax liming wax.

step one- wax 1 with liming

Step two- sand just a little, going with the grain of course.

step two- sand

Stain with ebony.

step three a-stain ebony step three b-stain ebony

Steps four, five, and six- keep waxing with the liming wax.

step four, five, and six- wax with liming

Buff and wax, buff and wax… Eventually it’ll look good enough to quit.  Here it is all finished:

done

detail finish 4

It wasn’t easy to photograph the finish, but I think it came out looking very Restoration Hardware.  🙂

finish 1 finish 3 finish 2

It’ll be “fun” sanding down the the dining set and matching this!  Maybe instead they’ll work with the light, unfinished style after all.  😉