
I’ve been a busy bee.
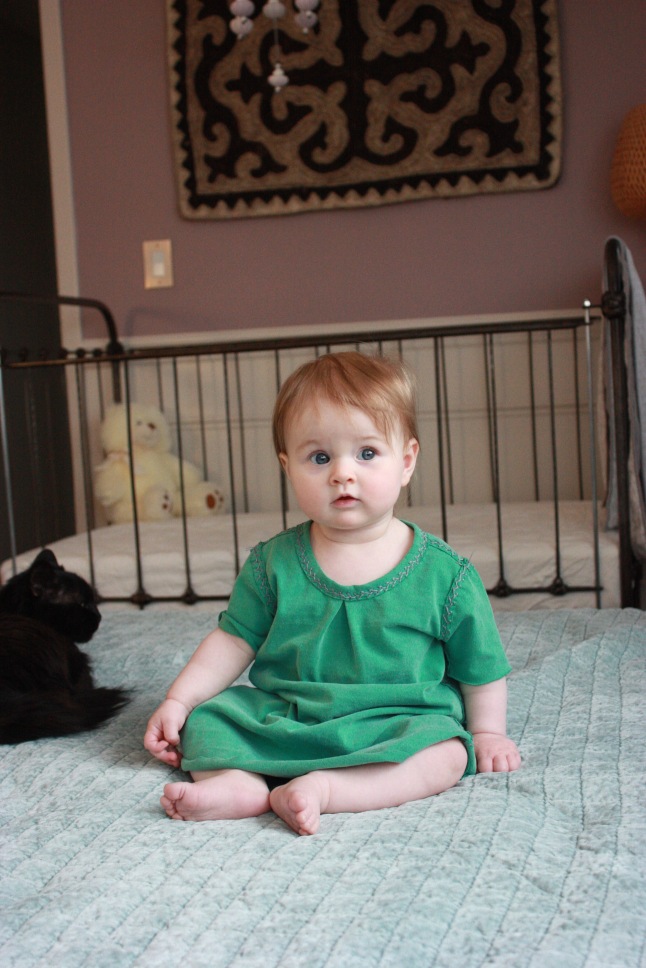
Today (the 11th but let’s see if I can post today…) I completed another baby dress for my daughter done entirely in hand stitching a la Alabama Chanin. This one had a complicated motif, comparable to the last dress I wrote about, but I was able to complete it much faster possibly due to more practice and since the design made for quicker stitching. Between these two complex dresses I also did an unembellished version and made plans for several gift items. The gifts took all of April, and now that we are into May I’ll be doing some sewing for D and myself hopefully.


I adore the aqua colour and feel of the fabric of this one! Too bad there isn’t much of the original T-shirt left for anything else, because I love, love, love it.
I must rush and complete one gift by Saturday and have to hide its existence from my soon to turn 40 year old husband. I’m not even sure I should write about it here in case he checks out the blog again, but he probably will not… Of course I didn’t get the time to finish this post until after the gift was done.
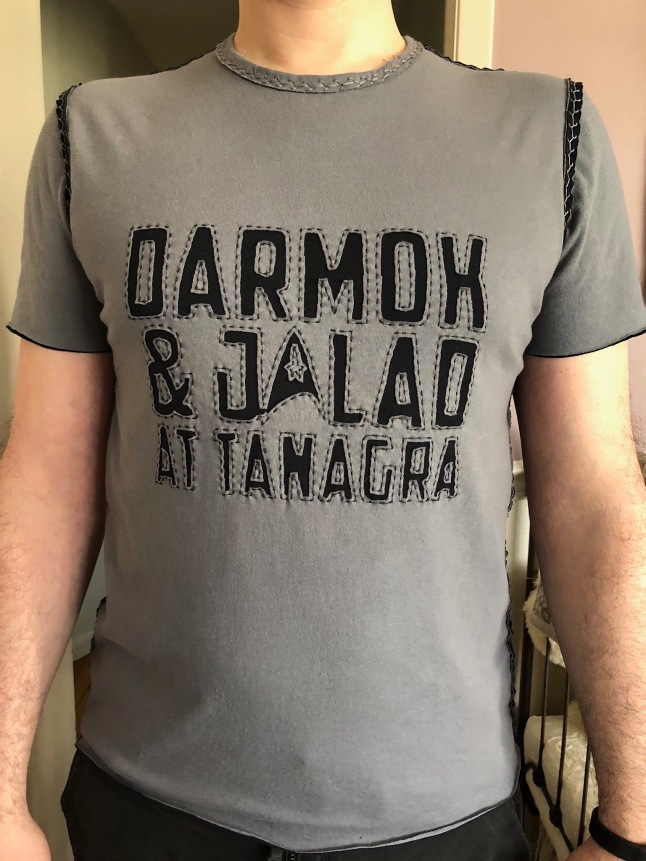
For L I made a T-shirt with a Star Trek inspired design on the chest. I kept it simple in hopes of quick progress but also keeping in mind that he only wears plain shirts. I would have liked to do a heavily stitched motif of the Enterprise or something cool, but due to procrastination and his tastes in fashion I skipped that and chose “Darmok & Jalad at Tanagra” instead of an image. I even planned to only decorate a purchased shirt, but then he told me how much he especially likes the seam stitching on Mini’s dresses, and so the project quadrupled in work. I only made and cut the pattern (tracing off a shirt that fits him well) this morning, because I work best under pressure, and I didn’t get serious about making a gift until so late! Unfortunately I discovered that 2XL Vneck shirts didn’t allow me to cut sleeves for his M sized shirt. Drat!!!! I had to run to the store and throw another package of shirts in the wash this evening, but I did cut the front and back, cut a paper stencil, traced with a Sharpie pen, and began basting the pieces. The stencil is too small for the best results, so I’ll be using a back-stitch instead of running. (I found the backstitch looked messy and went back to the running stitch.) I didn’t want to enlarge the letters any more, and I hope it turns out okay. Wish me luck! I tried using a few nicer fabric options, like dark red and black, before settling on grey and black due to limitations of “yardage.” I have three thread contenders: one matches the grey, one is a lighter grey, or I could go with black. I’ll try swatches tomorrow to settle on something.


The dress that I completed today was a sort of test for the motif of a gift. There is a local artist who creates lovely black&white cut paper bee designs (I’d have liked to get one for the nursery, actually,) and I was inspired to rip off do something similar when brainstorming for a decoration that a good friend of mine might enjoy. She has a couple of the artist’s works, and I’ve been trying to come up with a good gift for her for a long time now to show my appreciation of the many, many, many things she has done for me. She had told me she loved the Mini dresses and loved the idea of making something for a mutual friend when I mentioned the idea as a test. I’m excited to start that project, but I keep having to do other things. The practice dress has helped me refine the bee and honeycomb, so it was worth the delay?
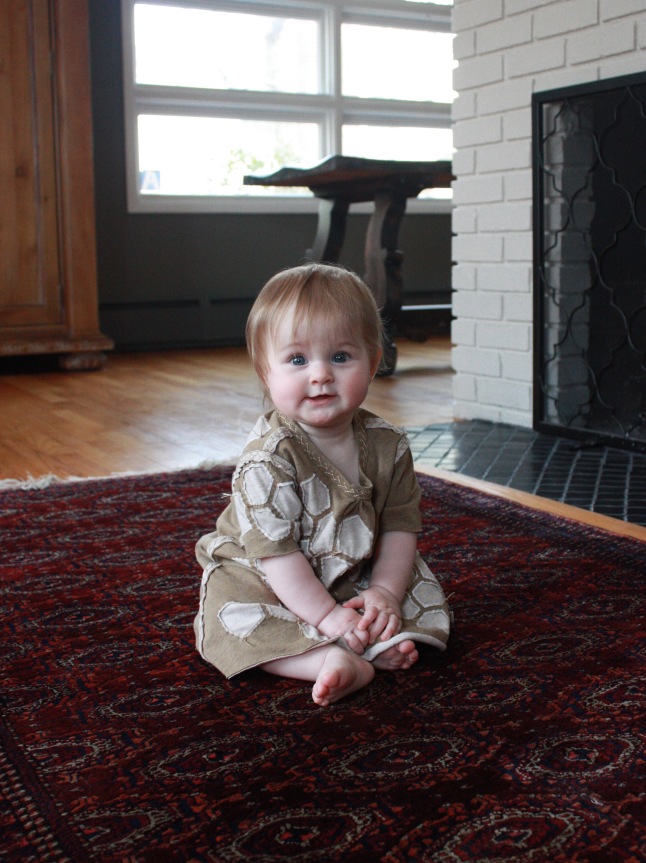
I’ve been making these dresses a bit large, so they don’t look so great yet in the modelled photos, alas.


I didn’t copy any of the bees exactly but simplified one, and I wanted to add honeycomb. For the next piece I might mix larger hexagons with smaller to work better with the bee? I was extremely unhappy with the way the two stencils I made came out and had to play around with them a lot and even cut out new ones. The plan was to have a bee at each end of the wrap, but I wasn’t happy enough with it to do the other panel. Luckily the honeycomb stitches up super fast compared to anything else, so it worked out great to use that instead.
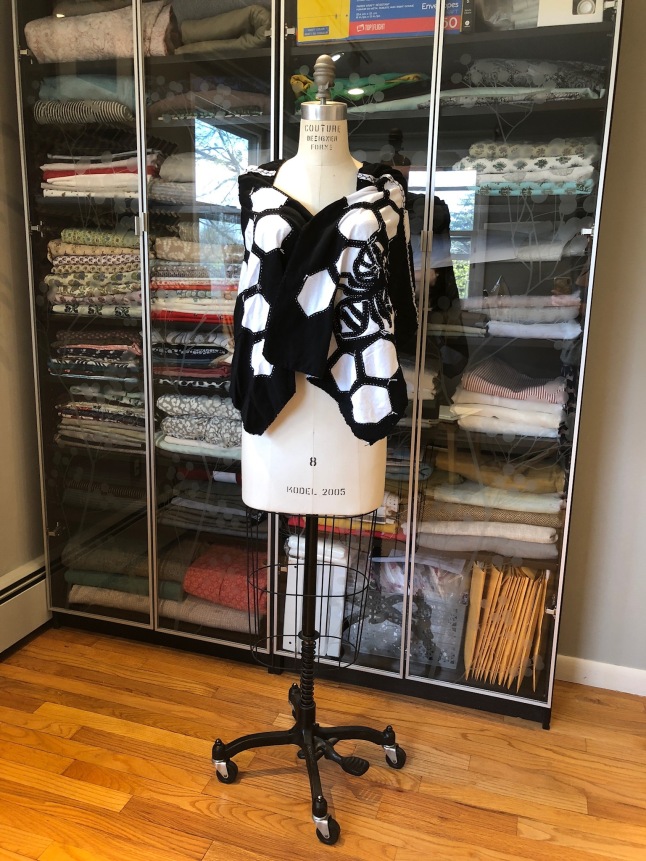
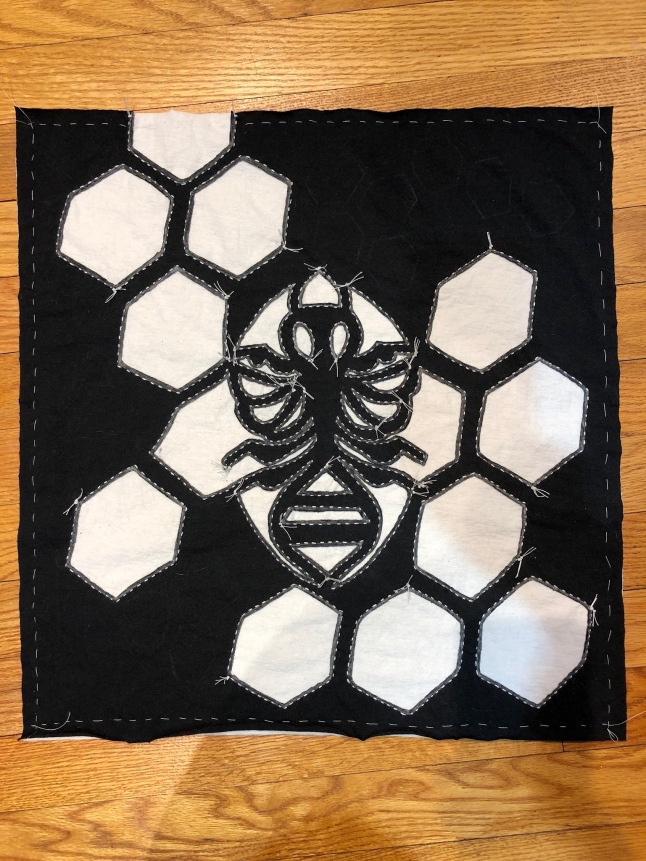


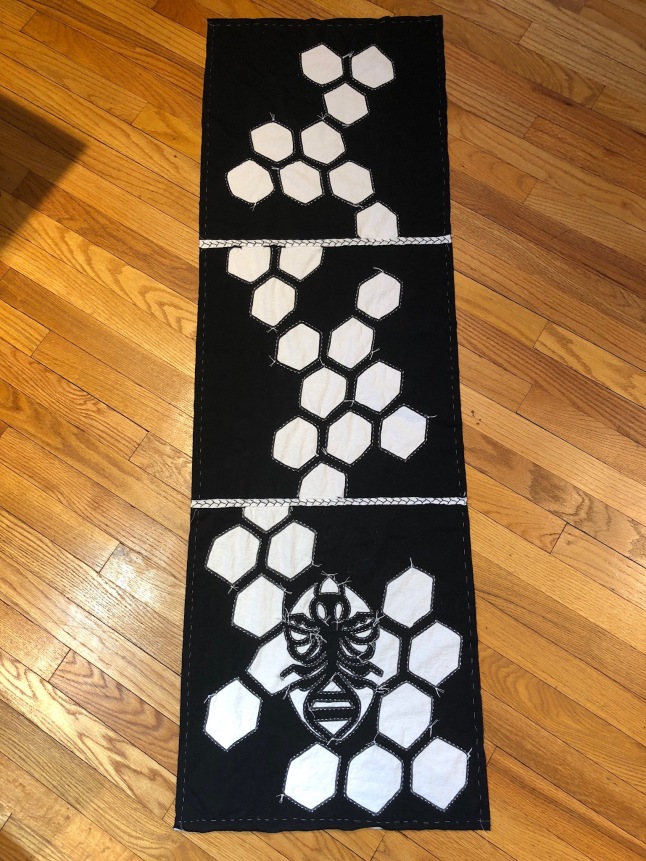


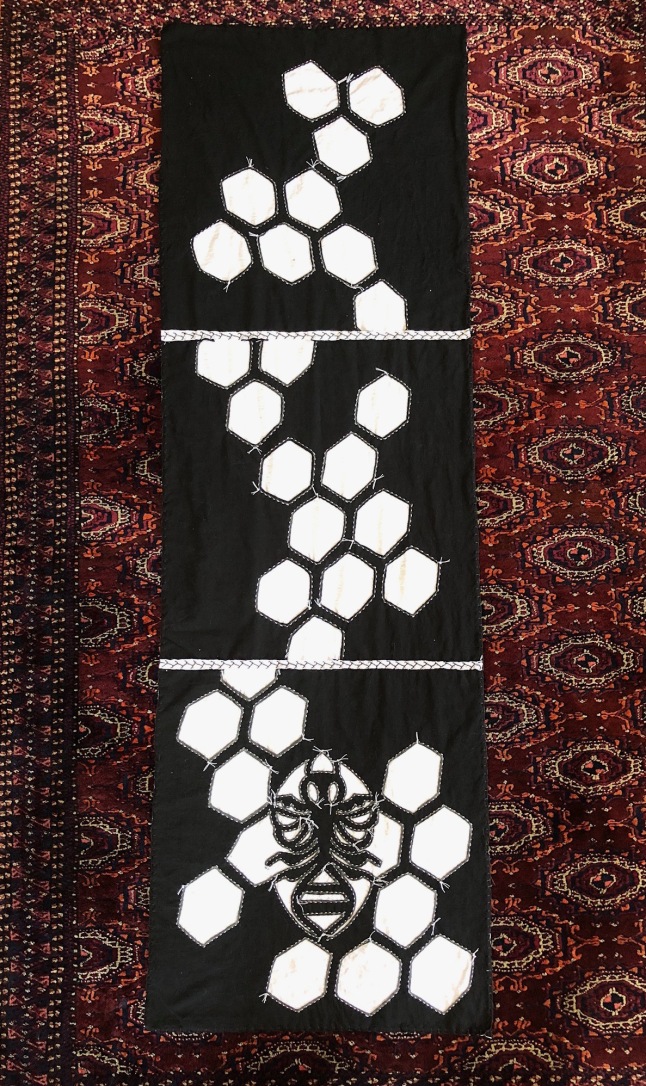
The black blanket stitch around the edge doesn’t show very well. I like how it turned out. Perhaps I’ll make one similar for myself someday, but I’ll probably never get around to it. 😀 This post sure grew long in the nearly month that I’ve been adding to it!
